Welcome to Mama Homesteader!

Follow my family in year 3 of our homesteading journey. Along the way we try to answer the question ," What can one small family do to change their lives on little more than 1/10th of an acre?" Let's Find Out!

Tuesday, October 16, 2012

Why choose a lesser evil?

 
No reason at all to choose a lesser evil in the upcoming elections, just think outside the box and make the choice that makes sense!


               Mr. Bobby and Bexar, I hope you get a good chuckle out of this!


                                              Cheers!~ MamaHomesteader

Wednesday, August 29, 2012

Garden update

   Well Summer has pretty much passed us by! Oh my, where did the time go? It seems just like yesterday that I was getting ready for spring gardening, and now fall is creeping up. In my head I'm now focusing on cleaning up of the summer garden, and looking forward to fall.
    I've already harvested tons of tomatoes, all my peppers, my potatoes, garlic, onions, beets, broccoli, kale, collards, mustard, Swiss chard, cauliflower, asparagus, and turnips. That's not counting tons of strawberries, huskberries, lettuce,herbs, and spinach. At this point I'm harvesting corn and green beans, and LOTS of tomatoes and huskberries yet. (The corn didn't fair well, but many people have had issues with it this summer.) With the drought some items did better than others, our cucumbers, carrots, parsnips, zucchini and squash didn't even come up -while our tomatoes took off ( I DID mention the TONS of tomatoes right?)
   What's left for fall? The brussel sprouts are starting to form, we still have okra and pumpkins, and a few tiny watermelon. There are more beans and a few late planted turnips, and of course late planted broccoli. Thankfully the tomatoes have little time left :)

For now, I'll leave you with the Aerial video of the garden around the beginning of July:)


How's your garden growing?
 
Cheers~ MamaHomesteader

Thursday, June 28, 2012

Canning Apricots

   Another outstanding recipe from Linda J. Amendt's book, " Blue Ribbon Preserves". This is the following recipe I use for canning apricots. These beauties are summer time in a jar!


Apricots
makes  about 4 pints or 2 quarts

5 lbs firm, unblemished, ripe apricots
4 cups water
1 1/2 cups sugar
8 cups cold water
2 tablespoons antioxidant/ascorbic acid crystals (substitute 1/4 cup lemon juice)


Rinse the apricots in cool water and drain well.

In a 4 quart pan, combine sugar and four cups water. Over medium-low heat, heat mixture until the sugar has dissolved. Bring the mixture to a boil and boil for 5 minutes. Reduce the heat, cover, and keep syrup hot until needed.

In a large bowl combine the water and crystals/or lemon juice. Combine well.
Cut each apricot in half, remove the pit and drop the fruit into the mixture to prevent browning. If using crystals, do not let the fruit sit in the mixture more than 20 minutes. Remove the halves from the solution and rinse in cool water. Drain well.

Add the apricot halves to the syrup. Over medium-low heat, stirring gently, heat the fruit for 3 to 4 minutes. Remove the pan from heat.

Ladle 1/4 cup syrup into a hot prepared jar. Pack the apricots cut side down into the jars leaving 1/2 inch headspace. Ladle extra syrup as needed.

Remove any trapped air bubbles.  Apply a hot lid and screw ring, and waterbath process. Process pints at 190F to 200F for 20 minutes, quarts for  25 minutes.


                                         I hope you enjoy  these as much as we do!

                                               Cheers!~ Mama Homesteader

Jam Session

  This time of the year kicks off my summer long jam session. Last year, I shared the recipe for Apricot Jam and Apricot Cookie Filling, as well as my recipe for Strawberry Jam. These were a real hit with my Family, and also with those who recieved homemade goody baskets at christmas.

  This year was slightly different. I made the same amount of Apricot jam, but I turned the skins into Apricot butter (by accident)! I also made sure to can some of those little jems for a cold winters day, because my husband dearly loves Apricots. And  I still want to make some cookie filling for his favorite cookies.
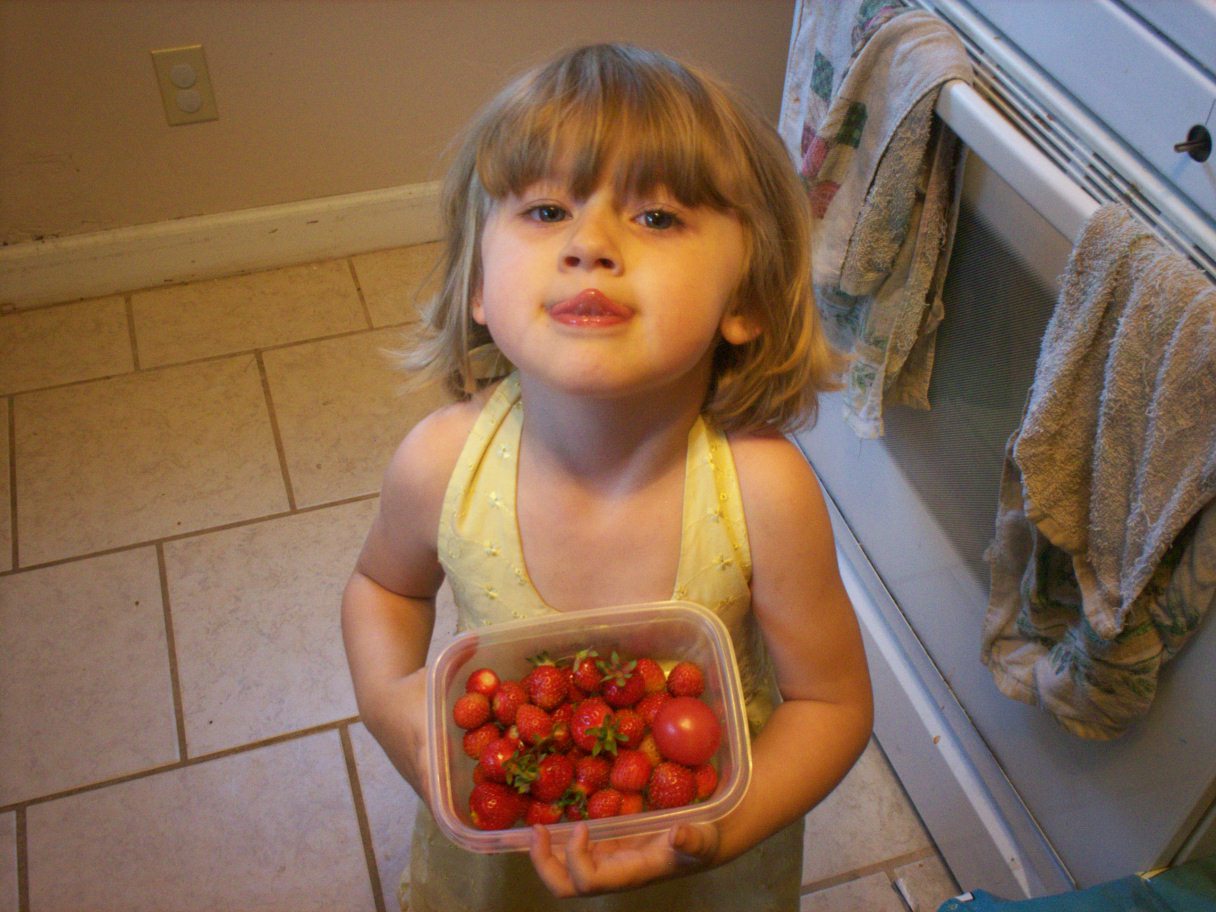
  But Instead of store bought strawberries- we took Sarah strawberry picking at Waltz Berry patch in Paris, Ohio. We wanted to keep most of our homegrown strawberries for her to eat fresh. I used the berries we picked for jam (as well as freezing several quarts), which turned out incredibly well this year. I plan on making a second smaller batch with some of our homegrown berries, to use as gifts for grandparents at christmas.


                            Yummy berries from our berry beds!


At the Berry Patch!

While our summer jam session is far from over, I look forward to sharing more jam recipes with you along the way.  The fresh fruit of summer is the best way to chase away a cold winter Day! 

Cheers!~ Mama Homesteader

Sarah And Mr. Bobby

    Although I've been absent from the blog over the last few months, Sarah and I  have had wonderful adventures in our garden. One of my pastimes is looking up gardening ideas on youtube and putting them to use here. I subscribed to a fellow named Bobby (mhpgardener) on youtube, because he was down to earth and shared a lot of helpful information. I never dreamed that it would lead to new friendships for Sarah and I!.
    A little background about Mr. Bobby. This gentleman lives in Virginia, which puts him a zone or two warmer than us up here in Ohio. His plants are already producing TONS of delicious veggies. He gardens on a massive scale, and gives much of his produce to those who need it. He's an all around great guy, and I feel very thankful that he has come into our lives.
     I made the comment on two of his videos, that Sarah loved to "pick" his veggies right off the computer screen and put them in her basket. Low and behold he went out of his way to make a special memory for her. He made a video for her, showing himself picking fresh veggies just for her- then mailed them to her. It was like christmas, and they were prized trophies!
    Sarah considers Mr. Bobby her special friend ,and always asks about him, and wants to watch more videos. Especially the one that "says her." So here I present the store in its entirety, as unfolded on youtube!


                                                 Cheers!~ Mama Homesteader

Tuesday, April 24, 2012

Quick Spring Update

  Just a quick spring update! Mother nature certainly has us on our toes the last few days, with snow predicted over the last two nights and tonight. Thankfully I've been able to do a quick and dirty frost cover for Kiddo's Strawberry bed using old sheets and bags of sand. Plenty of old totes have made short work of covering the Elderberry, Honeyberry, Currant, and Gooseberry bushes.And For the most part I've left our fall planted Black Raspberry bushes to their own devices. Since they are a wild variety, they are well suited to the environment. Last fall, I planted a dozen canes across the back fence, and this spring all twelve have started growing.

Gooseberry start when it was first planted
Newly planted strawberry beds behind DH and Kiddo!

  
Indoor seedlings are doing well. Lately when temperatures have been above 59 degrees F- I've set out Broccoli, Cauliflower, Kale, Collard, Lettuce, and Mustard seedlings. Doing so gets them more light and strengthens them, which is important because they will be the first  seedlings planted out. The Tomato and Pepper seedlings will have a few weeks to wait, it's still far to cold for them yet.


Broccoli Seedlings
Tomato seedlings


     These seedlings are larger now and about half have since been transplanted to larger pots. (In the near future I want to cover my current seed starting practices and how I want to overhaul them for  next year.)
    That is a quick update on what's going on! When I have the time I'll post about all  the changes being made to the garden!

                                                       ~ Cheers! Mama Homestader

Wednesday, April 11, 2012

Root Cellaring without a Root Cellar


     Last October/November I posted about my experiment of root cellaring without a formal root cellar. My home will be a century home in six years. It was build in 1918 as part of a WWI era planned community on the outskirts of town. The community itself was never finished according to the original plan, mostly due to poor building conditions just south east of my street. All the houses in this small area are variations on two different layouts, neither layout incorporating a root cellar.... Which surprised me. Considering the date in which the home was built, I would have thought it was something that would have been incorporated. But maybe its just the cut off time at which a root cellar was considered a necessity. Many of the older homes I've lived in have had a space that could have been easily converted to such a cause, while homes built after the 1920's seem to have none.
    But I digress. My home has no root cellar, and that lead me to experiment on finding ways to root cellar without one. At first I thought about the basement, but it draws damp and the cleanliness factor is less than ideal. Even if I built an enclosed room and tried to maintain a clean, temp controlled atmosphere I'd be lucky if it would work. The shed was even less of an option, it wasn't  exactly critter proof and any sand left in bags tended to freeze solid. In the end, I chose the downstairs coat closet. In the end it was clean, critter free, and cold but not freezing. The closet itself has two outside walls and two indoor walls. It was the perfect balance between the temperatures.
   And you know what? IT WORKED! I've been pleasantly surprised by the outcome of my experiment. So much so, that next year, I'll be doing it again. This year I stored carrots, winter squash, parsnips, turnips, rutabagas, and some onions.. The carrots, parsnips, and turnips- I stored in damp sand. The rest I stored in a wicker basket.
    Here's what I did: I bought twelve bunches of carrots at the local farmers market.  I brought them home, did NOT wash them, and cut off the tops (Even that little nubbin that sticks up after you tear the tops off. Make a nice clean slice, don't leave anything or else your carrots will sprout!). Then I took a large Rubbermaid tote, laid down a layer of  slightly damp play sand, and added a layer of prepped carrots. It's important that your carrots don't touch, so that you can avoid potential contamination from spoilage! Then covered them with a layer of sand. Repeated the process.. When all the carrots were snuggled in, I put the lid on. Stuck it in the closet. Checked ever once in awhile for bad carrots and discarded  them to avoid the whole tote going bad.
   I didn't put a lid on the parsnips and turnips and seemingly they only lasted up until January, but my carrots lasted up until Easter! WOW nearly 7 months! I had very little spoilage, and that was only within the last week.( I'm certain that if the weather had not gotten unseasonably warm for a spell, then my carrots would have stayed snuggled in just fine for awhile longer.) My squashes and such lasted until January, and since I'm the only one who eats winter squash, I won't be cellaring as many next fall!
   Sarah enjoyed the experiment immensely. She thought it was cool that when she wanted a carrot, Mommy and her would dig in the sand to find one and wash it up. She loves carrots, and I'm just glad to have been able to save her favorite ones- which are way better than store bought.
 
             The big points to remember when root cellaring without a root cellar:
                   1) Choose a  location that remains cold, but not freezing.
                   2) Choose a location free of critters
                   3) Research the conditions needed, experiment accordingly
                   4) Make sure its easily accessible!
                   5) Have FUN!


                                               Cheers!~ Mama Homesteader